By: CS2113-AY1819S1-T13-1 Since: September 2018 Licence: MIT
- 1. Introduction
- 2. Quick Start
- 3. Features
- 3.1. Viewing help :
help - 3.2. Adding a person:
add - 3.3. Listing all persons :
list - 3.4. Editing a person :
edit - 3.5. Locating persons by name:
find - 3.6. Locating contacts by address:
findaddress - 3.7. Locating contacts by name:
findname - 3.8. Locating contacts by phone:
findphone - 3.9. Deleting a person :
delete - 3.10. Selecting a person :
select - 3.11. Listing entered commands :
history - 3.12. Undoing previous command :
undo - 3.13. Redoing the previously undone command :
redo - 3.14. Adding an expense:
addExpense - 3.15. Editing an expense :
editExpense - 3.16. Deleting an expense :
deleteExpense - 3.17. Undoing previous command :
undoExpense - 3.18. Redoing the previously undone command :
redoExpense - 3.19. Clearing all expense entries :
clearExpense - 3.20. Displaying expense trend :
expenseTrend - 3.21. Displaying monthly expense :
monthlyExpense - 3.22. Adding a task:
task - 3.23. Listing all tasks :
listTask - 3.24. Editing a task :
updateTask - 3.25. Deleting a task :
deleteTask - 3.26. Adding an event :
addEvent - 3.27. Deleting an event :
deleteEvent - 3.28. Clearing the event book :
clearEvent - 3.29. Editing an event :
editEvent - 3.30. Saving the data
- 3.31. Backup data :
backup - 3.32. Restore data :
restore - 3.33. Clearing all entries :
clear - 3.34. Exiting the program :
exit - 3.35. Configure backup and restore settings
[coming in v2.0] - 3.36. Encrypting data files
[coming in v2.0]
- 3.1. Viewing help :
- 4. FAQ
- 5. Command Summary
1. Introduction
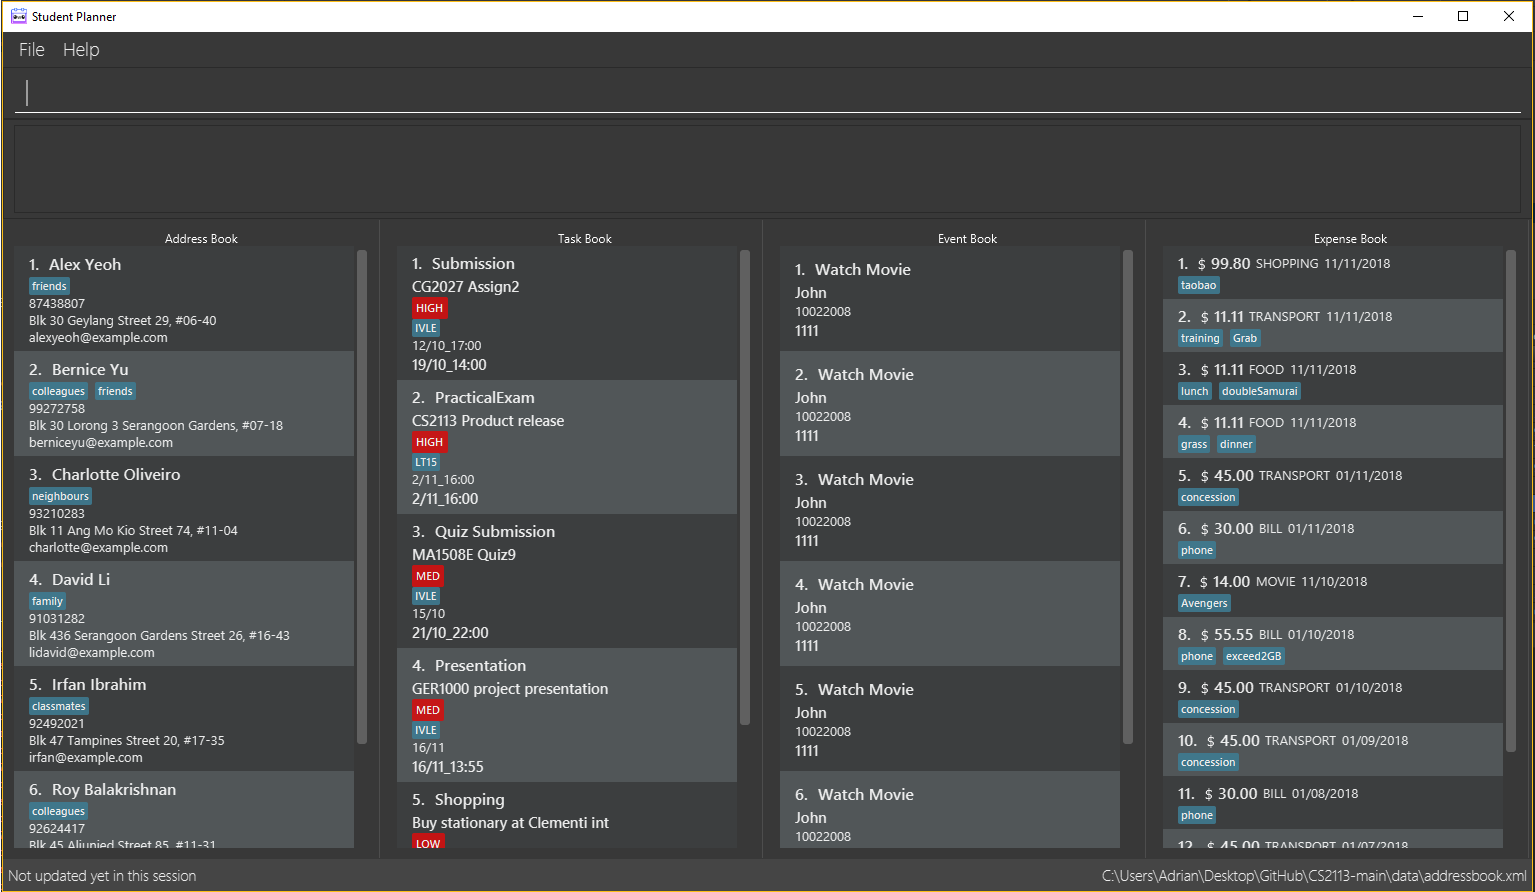
Student Planner (SP) is for a one stop desktop app for students to manage their schedule. More importantly, SP is optimized for those who prefer to work with a Command Line Interface (CLI) while still having the benefits of a Graphical User Interface (GUI). If you can type fast, you can use SP for all your daily scheduling done faster than traditional GUI apps. Interested? Jump to the Section 2, “Quick Start” to get started. Enjoy!
2. Quick Start
-
Ensure you have Java version
9or later installed in your Computer. -
Download the latest
studentplanner.jarhere. -
Copy the file to the folder you want to use as the home folder for your Student Planner.
-
Double-click the file to start the app. The GUI should appear in a few seconds.
-
Type the command in the command box and press Enter to execute it.
e.g. typinghelpand pressing Enter will open the help window. -
Some example commands you can try:
-
list: lists all contacts -
taskn/Attend Post Modern Jukebox concert b/hyped s/18/09_2000 e/18/09_2200 p/HIGH t/concerton18 September 2018 at 8pmwithHIGHpriority to the Address Book. -
delete3: deletes the 3rd contact shown in the current list -
exit: exits the app
-
-
Refer to Section 3, “Features” for details of each command.
3. Features
Command Format
-
Words in
UPPER_CASEare the parameters to be supplied by the user e.g. inadd n/NAME,NAMEis a parameter which can be used asadd n/John Doe. -
Items in square brackets are optional e.g
n/NAME [t/TAG]can be used asn/John Doe t/friendor asn/John Doe. -
Items with
… after them can be used multiple times including zero times e.g.[t/TAG]…can be used ast/friend,t/friend t/familyetc. -
Parameters can be in any order e.g. if the command specifies
n/NAME d/DATE,d/DATE n/NAMEis also acceptable.
3.1. Viewing help : help
Format: help
3.2. Adding a person: add
Adds a person to the address book
Format: add n/NAME p/PHONE_NUMBER e/EMAIL a/ADDRESS [t/TAG]…
| A person can have any number of tags (including 0) |
Examples:
-
add n/John Doe p/98765432 e/johnd@example.com a/John street, block 123, #01-01 -
add n/Betsy Crowe t/friend e/betsycrowe@example.com a/Newgate Prison p/1234567 t/criminal
3.3. Listing all persons : list
Shows a list of all persons in the address book.
Format: list
3.4. Editing a person : edit
Edits an existing person in the address book.
Format: edit INDEX [n/NAME] [p/PHONE] [e/EMAIL] [a/ADDRESS] [t/TAG]…
Examples:
-
edit 1 p/91234567 e/johndoe@example.com
Edits the phone number and email address of the 1st person to be91234567andjohndoe@example.comrespectively. -
edit 2 n/Betsy Crower t/
Edits the name of the 2nd person to beBetsy Crowerand clears all existing tags.
3.5. Locating persons by name: find
Finds persons whose names contain any of the given keywords.
Format: find KEYWORD [MORE_KEYWORDS]
Examples:
-
find John
ReturnsjohnandJohn Doe -
find Betsy Tim John
Returns any person having namesBetsy,Tim, orJohn
3.6. Locating contacts by address: findaddress
Finds contacts whose address or body contain any of the given keywords.
Format: findaddress KEYWORD [MORE_KEYWORDS]
Examples:
-
findaddress College
ReturnscollegeandCollege ave e -
findaddress college lorong tampines
Returns any contacts having an address or body that containscollege,lorong, ortampines
3.7. Locating contacts by name: findname
Finds contacts whose name or body contain any of the given keywords.
Format: findname KEYWORD [MORE_KEYWORDS]
Examples:
-
findname Mario
ReturnsmarioandMario Gonzalez -
findname mario alex david
Returns any contacts having names or body that containsmario,alex, ordavid
3.8. Locating contacts by phone: findphone
Finds contacts whose phone number or body contain any of the given keywords.
Format: findname KEYWORD [MORE_KEYWORDS]
Examples:
-
findphone 98835761
Returns98835761and the contact with that phone number -
findphone 98835761 87438807
Returns any contacts having phone number or body that contains98835761, or87438807
3.9. Deleting a person : delete
Deletes the specified person from the address book.
Format: delete INDEX
Examples:
-
list
delete 2
Deletes the 2nd person in the address book. -
find Betsy
delete 1
Deletes the 1st person in the results of thefindcommand.
3.10. Selecting a person : select
Selects the person identified by the index number used in the displayed person list.
Format: select INDEX
Examples:
-
list
select 2
Selects the 2nd person in the address book. -
find Betsy
select 1
Selects the 1st person in the results of thefindcommand.
3.11. Listing entered commands : history
Lists all the commands that you have entered in reverse chronological order.
Format: history
|
Pressing the ↑ and ↓ arrows will display the previous and next input respectively in the command box. |
3.12. Undoing previous command : undo
Restores the address book to the state before the previous undoable command was executed.
Format: undo
|
Undoable commands: those commands that modify the address book’s content ( |
Examples:
-
delete 1
list
undo(reverses thedelete 1command) -
select 1
list
undo
Theundocommand fails as there are no undoable commands executed previously. -
delete 1
clear
undo(reverses theclearcommand)
undo(reverses thedelete 1command)
3.13. Redoing the previously undone command : redo
Reverses the most recent undo command.
Format: redo
Examples:
-
delete 1
undo(reverses thedelete 1command)
redo(reapplies thedelete 1command) -
delete 1
redo
Theredocommand fails as there are noundocommands executed previously. -
delete 1
clear
undo(reverses theclearcommand)
undo(reverses thedelete 1command)
redo(reapplies thedelete 1command)
redo(reapplies theclearcommand)
3.14. Adding an expense: addExpense
Adds an expense to the expense book
Format: addExpense c/CATEGORY v/VALUE d/DATE [t/TAG]…
| An expense can have any number of tags (including 0) |
Examples:
-
addExpense c/taobao v/1111.11 d/11/11/2018 -
addExpense c/Lunch v/6.66 d/10/10/2018 t/nomorecaipng t/fishtooexpensive
3.15. Editing an expense : editExpense
Edits an existing expense in the Expense book.
Format: edit INDEX [c/CATEGORY] [v/VALUE] [d/DATE] [t/TAG]…
Examples:
-
`editExpense 1 v/998.00
Edits the value of expense of the 1st expense -
editExpense 2 c/food t/lunch
Edits the category of the 2nd person to befood, remove the existing tags and add new tag.
3.16. Deleting an expense : deleteExpense
Deletes the specified expense from the expense book.
Format: deleteExpense INDEX
Examples:
-
delete 2
Deletes the 2nd expense in the expense book.
3.17. Undoing previous command : undoExpense
Restores the expense book to the state before the previous undoable command was executed.
Format: undoExpense
|
Undoable commands: those commands that modify the expense book’s content ( |
Examples:
-
deleteExpense 1
undoExpense(reverses thedeleteExpense 1command) -
expenseTrend
undoExpense
TheundoExpensecommand fails as there are no undoable commands executed previously. -
deleteExpense 1
clearExpense
undoExpense(reverses theclearExpensecommand)
undoExpense(reverses thedeleteExpense 1command)
3.18. Redoing the previously undone command : redoExpense
Reverses the most recent undoExpense command.
Format: redoExpense
Examples:
-
deleteExpense 1
undoExpense(reverses thedeleteExpense 1command)
redoExpense(reapplies thedeleteExpense 1command) -
deleteExpense 1
redoExpense
TheredoExpensecommand fails as there are noundoExpensecommands executed previously. -
deleteExpense 1
clearExpense
undoExpense(reverses theclearExpensecommand)
undoExpense(reverses thedeleteExpense 1command)
redoExpense(reapplies thedeleteExpense 1command)
redoExpense(reapplies theclearExpensecommand)
3.19. Clearing all expense entries : clearExpense
Clears all entries from the expense book.
Format: `clearExpense
3.20. Displaying expense trend : expenseTrend
Displays a bar chart of the monthly expense value occurred the past 6 months in a new window
Format: expenseTrend
3.21. Displaying monthly expense : monthlyExpense
Displays a pie chart of the expense value for each category occurred in the selected month in a new window
format: monthlyExpense MM/YYYY
Examples:
-
monthlyExpense 11/2018
Displays the monthly expense data for November 2018 in a new window
3.22. Adding a task: task
Adds a task to the schedule planner
Format: task n/NAME b/BODY s/START_DATETIME e/END_DATETIME [t/TAG]… p/PRIORITY
| A task can have any number of tags (including 0). |
| By default, the tasks are listed by descending order of priority i.e. HIGH, MED, LOW. |
Examples:
-
task n/Submit Assignment b/CG2027 Assign2 s/18/10 e/25/10_14:00 p/HIGH t/Hardcopy -
task n/Submit Quiz b/MA1508E Quzi11 s/29/10_00:00 e/4/11_22:00 p/MED t/IVLE
3.23. Listing all tasks : listTask
Shows a list of all tasks from task book in the student planner according to the deadline (end DateTime).
Format: listTask
3.24. Editing a task : updateTask
Update an existing task in the student planner.
Format: updateTask INDEX [n/NAME] [b/BODY] [s/START_DATETIME] [e/END_DATETIME] [t/TAG]… [p/PRIORITY]
Examples:
-
updateTask 1 b/Need two pens
Edits the body of the 1st task to beNeed two pens. -
updateTask 2 t/
Edits the 2nd task by clearing all existing tags.
3.25. Deleting a task : deleteTask
Deletes the specified task from the task book in the student planner.
Format: deleteTask INDEX
Examples:
-
listTask
deleteTask 2
Deletes the 2nd task from the task book.
3.26. Adding an event : addEvent
Adds an event to the event book
Format: addEvent n/NAME s/EVENT DATE t/EVENT TIME [c/CONTACT]…
| An event can have any number of contacts (including 0). |
Examples:
* addEvent n/Dinner s/11/11/2018 t/1900 c/Alex
* `addEvent n/Secondary school meetup s/24/10/2018 t/1200 `
3.27. Deleting an event : deleteEvent
Deletes an event from the event book
Format: deleteEvent INDEX
Examples:
* deleteEvent 1
3.28. Clearing the event book : clearEvent
Clears the entire event book
Format: clearEvent
3.29. Editing an event : editEvent
Edits specific details of the event
Format: editEvent INDEX [n/EVENT NAME] [s/EVENT DATE] [t/EVENT TIME] [c/EVENT CONTACTS]…
| An edit must consist of at least 1 parameter to edit. |
Examples:
* editEvent 2 t/1900
* editEvent 1 n/Watch The Incredibles t/1800
3.30. Saving the data
Schedule planner data are saved in the hard disk automatically after any command that changes the data.
There is no need to save manually.
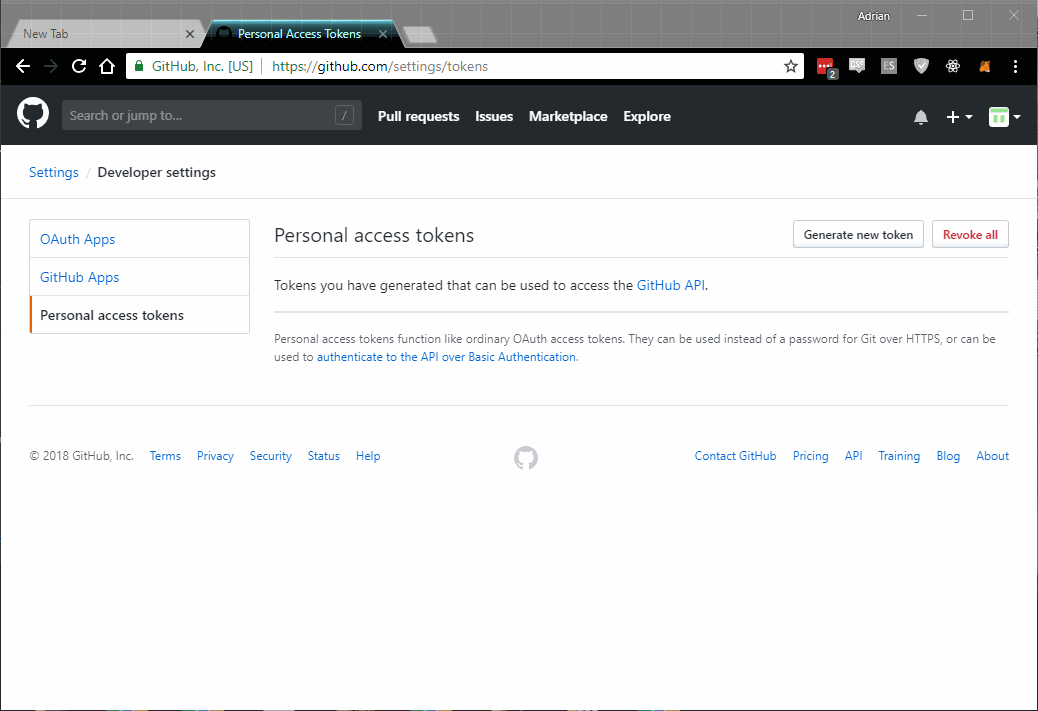
3.31. Backup data : backup
Allow user to backup data locally or to online services.
Format: backup | [GITHUB ACCESS_TOKEN]
Examples:
-
backup
Creates a local backup to the backup paths inpreferences.json. -
backup github ACCESS_TOKEN_HERE
Creates an online backup to GitHub Gists using the provided personal access token.
3.32. Restore data : restore
Allow user to restore data backups locally or from online services.
Format: restore | [Service ACCESS_TOKEN_IF_REQUIRED]
Examples:
-
restore
Restores Student Planner data using local backups in backup paths insidepreferences.json. -
restore github
Restores Student Planner data on GitHub Gists.
3.33. Clearing all entries : clear
Clears all entries from the schedule planner.
Format: clear
3.34. Exiting the program : exit
Exits the program.
Format: exit
3.35. Configure backup and restore settings [coming in v2.0]
Allow user to configure backup settings (configure and save cloud services authentication tokens like GitHub gists or Google Drive, backup location) by calling backup doctor
3.36. Encrypting data files [coming in v2.0]
Allow user to enable encryption by calling encrypt p/PASSWORD
Application will prompt for decryption password if encryption is enabled
4. FAQ
Q: How do I transfer my data to another Computer?
A: Install the app in the other computer and overwrite the empty data file it creates with the file that contains the data of your previous schedule planner folder.
Alternatively you can perform a backup to a supported online service like GitHub and restore form another computer after changing the relevant gist ids in your preferences.json file
5. Command Summary
-
Add
add n/NAME [b/BODY] [s/START_DATETIME] [e/END_DATETIME] [t/TAG]… [p/PRIORITY]
e.g.add n/Attend PostModern JukeBox concert e/180918_2000 p/HIGH -
Clear :
clear -
Delete :
delete INDEX
e.g.delete 3 -
Edit :
edit INDEX [n/NAME] [b/BODY] [s/START_DATETIME] [e/END_DATETIME] [t/TAG]… [p/PRIORITY]
e.g.edit 2 n/Buy fruits e/010119_0700 -
Find :
find KEYWORD [MORE_KEYWORDS]
e.g.find pen Apple -
List :
list -
Help :
helpe.g.select 2 -
History :
history -
Undo :
undo -
Redo :
redo -
Backup :
backup | [GITHUB ACCESS_TOKEN]e.g.backup GITHUB MY_ACCESS_TOKEN -
Restore :
restore | [SERVICE ACCESS_TOKEN]e.g.restore GITHUB
-
AddExpense :
addExpense c/CATEGORY v/VALUE d/DATE [t/TAG]…
e.g.addExpense c/Food v/11.11 d/11/11/2018 t/KFC t/lunch t/fat -
ClearExpense :
clearExpense -
DeleteExpense :
deleteExpense INDEX
e.g.deleteExpense 3 -
EditExpense :
editExpense INDEX [c/CATEGORY] [v/VALUE] [d/DATE] [t/TAG]…
e.g.editExpense 2 c/Travel v/998.00 -
UndoExpense :
undoExpense -
RedoExpense :
redoExpense -
ExpenseTrend :
expenseTrend -
MonthlyExpense :
monthlyExpense MM/YYYY
e.g.monthlyExpense 11/2018 -
AddTask :
task n/NAME b/BODY s/START_DATETIME e/END_DATETIME [t/TAG]… p/PRIORITY
e.g.task n/Submit Assignment b/CG2027 Assign2 s/18/10 e/25/10_14:00 p/HIGH t/Hardcopy -
ListTask :
listTask -
EditTask :
updateTask INDEX [n/NAME] [b/BODY] [s/START_DATETIME] [e/END_DATETIME] [t/TAG]… [p/PRIORITY]
e.g.updateTask 2 -
DeleteTask :
deleteTask INDEX
e.g. `deleteTask 2 ` -
AddEvent :
addEvent n/NAME s/EVENT DATE t/EVENT TIME [c/EVENT CONTACTS]…
e.g.addEvent n/Movie s/18/10/2018 t/1800 c/John -
DeleteEvent :
deleteEvente.g.deleteEvent 1 -
EditEvent :
editEvent INDEX [n/NAME] [s/EVENT DATE] [t/EVENT TIME] [c/EVENT CONTACTS]…
e.g.editEvent 1 t/1800 -
ClearEvent :
clearEvent
e.g.clearEvent